Step 1:
- Setup:
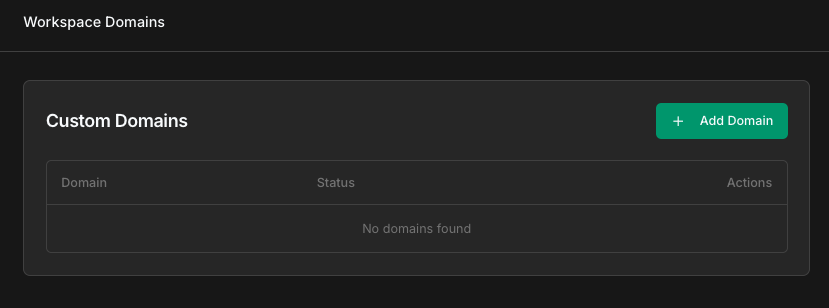
- Go to “Domains” page - app.bult.ai/domains.
-
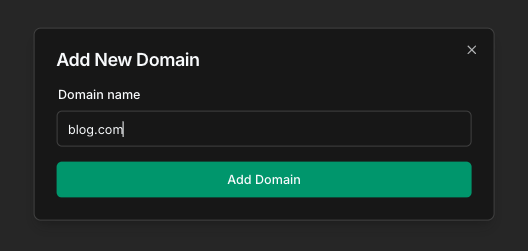
Click “Add Domain”.
-
Enter domain: for example, blog.com.
-
Configure DNS with CNAME to auto-generated value (e.g., gj7g3dvv.fin1.bult.app.).
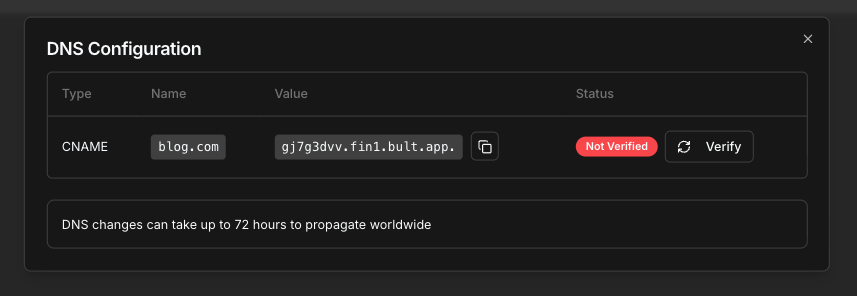
- Click “Verify” (DNS propagation may take 72 hours).
- Status:
- Not Verified: DNS not propagated.
- Verified: Ready to use.
- Actions:
- DNS Configuration: View CNAME details.
- Delete Domain: Irreversible; confirm in “Delete Domain” prompt.
- Auto-Generated URLs: Default URLs (e.g., https://blog.fin1.bult.app) provided for all services.
- Security: Automatic SSL for all domains (custom and auto-generated).
- Limits: Free tier: 1 custom domain. Pro: unlimited domains, prioritized DNS verification.
Step 2:
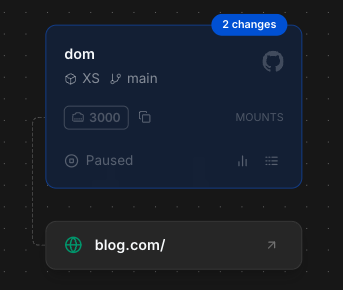
- Go to your project.
- Select your service.
-
In “Edit Service” window, click “Add Route”.
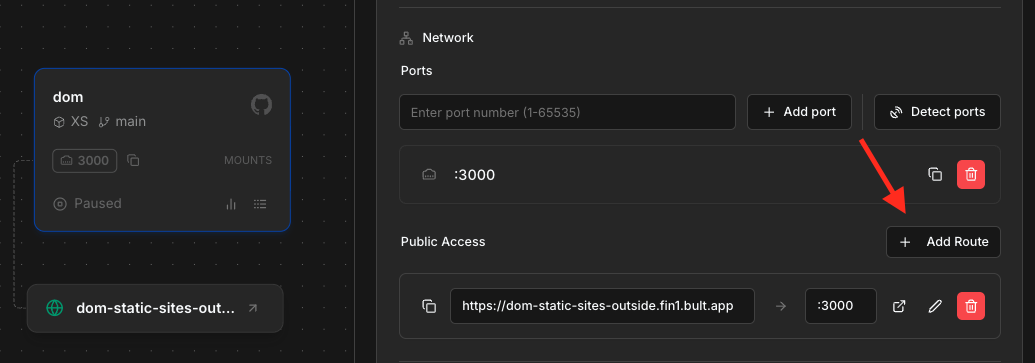
-
Select your domain in the dropdown list.
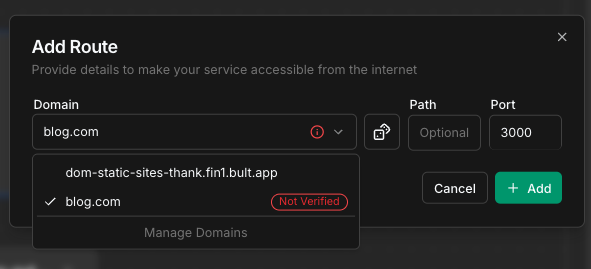
- Click “Add”.